Ocarina Workshop: The Sound of Clay
Quick Answer: Making a functional ocarina in a workshop depends primarily on mouthpiece calibration - not finger hole placement. Using the Rélyéf two-part mould, mouthpiece calibration tool, and tapered hole tool, even complete beginners achieve consistent, tuned results. The workshop runs in 90 minutes (children) to 3 hours (schools and studios).
There's a moment in every ocarina workshop that no one expects. The clay is still soft, the seam barely dry - and then someone lifts the mouthpiece to their lips and blows. The room goes quiet.
Then it plays.
We've run a lot of workshops at Rélyéf. We've built ocarinas that played beautifully and ones that just hissed. And we've learned that the difference between the two isn't luck or experience. It's a system.
This guide is for teachers, studio owners, and workshop leaders who want every participant to walk away with an instrument that actually sounds - not just a nicely shaped piece of clay.
Watch our reel to see the process!
Why Most Ocarina Workshops Fall Short
Most first attempts at a clay ocarina end one of two ways: the instrument doesn't play at all (just an airy hiss), or it plays, but unpredictably. The problem is almost never the finger holes.
The mouthpiece is 80% of the ocarina's success. The angle and size of the windway determine whether air creates a tone or escapes as noise. Without a calibration tool, the result depends on the instructor's experience, intuition, and luck. In a classroom of thirty students, that isn't a strategy - it's a lottery.
That's why we developed the Rélyéf Ocarina Kit: to turn a functioning ocarina from an accident into a repeatable outcome.
What Makes an Ocarina "Workshop-Ready"

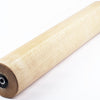
The foundation is a two-part mould. But the mould alone isn't enough. Three tools make the difference:
1. Template with pre-marked finger hole positions
Finger holes need to sit ergonomically. The template eliminates guesswork - participants know exactly where to punch.
2. Mouthpiece Calibration Tool
This is the heart of the system. It defines the correct size and angle of the windway. Without it, calibrating the mouthpiece is guesswork. With it, it's a repeatable step.
3. Tapered Hole Tool
After the initial holes (made quickly with a hole punch), the tapered tool allows gradual enlargement and fine-tuning. The rule: always start smaller, enlarge slowly, and check pitch with a tuner app as you go. You can't make a hole smaller - so take your time.
What's in the Kit
A) Core Ocarina Kit
-
Ocarina Moulds: Two-part system (top + bottom) to form the instrument's body.
-
Calibration Tool: For gradually enlarging and tuning finger holes.
-
Mouthpiece Calibration Tool: Defines the exact size and angle of the windway.
What to bring to your workshop (not included):
-
Hole Punch: Quick, consistent initial finger holes.
-
Separation Foil: Thin stretch wrap between clay and mould - easy release, clean workflow.
B) Optional Add-ons
-
Handheld Extruder: Speed up mouthpiece profiles and decorative reinforcements.
-
Harp Cutter: Clean edges, level joining surfaces flat.
-
Musical Note Stamps: Thematic decoration - instant wow factor.
-
Courier Alphabet Stamps: Personalise with names, class years, or school crests.
Step-by-Step: From Clay to Music
Preparation
Prepare soft, homogenous clay free of air bubbles. Line the mould with stretch wrap - this makes release clean and fast, which matters a lot in a classroom setting.
Step 1 - Forming the Body (20–30 min)


Press clay firmly into both halves of the mould. Keep wall thickness consistent throughout - thin spots crack during drying and affect the tone. Trim excess with the Harp Cutter: clean cut, flat surface, ready to join.
Step 2 - Assembly (10–20 min)
Score and slip both edges, then join the halves. The seam must be tight - leaks are the second most common reason an ocarina goes off-pitch. Let the joined body firm up for a few minutes before moving on.
Step 3 - The Mouthpiece (10–15 min)


Use the Mouthpiece Calibration Tool to set the windway angle and size. Check repeatedly until you get a clear, stable tone with all finger holes covered.
Do this before touching the finger holes. A mouthpiece that doesn't work now won't be saved by perfectly tuned holes later.
From the Rélyéf Workshop - Why We Calibrate the Mouthpiece First
Tomáš Macek: "For years, we built ocarinas in the wrong order - form first, holes next, decoration last. Then: 'Why doesn't it play?' The answer was almost always the mouthpiece. But fixing it after the holes are done and the clay is stiffening? That's a nightmare. Now we flip the process: mouthpiece comes first, right after joining the body - before we touch a single finger hole. It saves an hour of frustration and at least one broken instrument per group. And the workshop ends with music instead of a diagnostic session."
Step 4 - Finger Holes (20–30 min)

Punch the initial holes with the hole punch - quick, consistent, guided by the template. Then use the tapered tool to gradually enlarge and tune each hole individually with a phone tuner app.
Golden rule: enlarging raises the pitch. Work in tiny increments. You cannot undo an oversized hole.
Step 5 - Tuning (10–25 min)

Open a tuner app. First, stabilise the root note (all holes closed) via the mouthpiece. Then tune each finger hole one by one, from the lowest to the highest pitch.
Step 6 - Decoration (10–20 min)
Add Musical Note Stamps, Courier Alphabet Stamps, or custom details. Only decorate once the instrument plays correctly. Decorating a non-functional ocarina is wasted effort.
Step 7 - Drying and Firing
Dry slowly and evenly, ideally under plastic wrap. The mouthpiece area and centre seam are most prone to cracking - give them extra attention.
Three Workshop Formats
The Ocarina Kit is designed to work across three time frames:
90 minutes - fast-track for younger children or one-off events. One smaller ocarina, focus on the craft experience rather than precise tuning.
3 hours - the sweet spot for schools and studios. Full process: mould, mouthpiece calibration, hole tuning, optional decoration. The format participants want to repeat.
2×3 hours - best results. Session one: forming and initial holes. Session two: fine tuning, decoration, kiln prep. Works beautifully as a school project or two-part studio course.
Troubleshooting
-
No sound or airy tone: The windway angle or size is off. Re-insert the calibration tool and adjust until the tone clears.
-
Pitch drifts or won't stabilise: Inconsistent wall thickness or a leak in the seam. Seal and smooth the seam before retuning.
-
Poor ergonomics: Holes are too far apart or too large. Always use the mould template for placement, always start small, and enlarge gradually.
-
Cracking during drying: Usually around the mouthpiece or seam - these areas dry faster. Slow down the drying by covering with plastic wrap.
Want to Run This Workshop in Your Studio or School?
Join the Rélyéf Partner Program and get a partner discount on the full Ocarina Kit.
Or just write to us at info@relyefpotterytools.com - we'll help you figure out which format and kit level fits your setup best.
-
Posted in
ceramics, class, clay, creative, creative set, mold, music, music instrument, ocarina, stamps, Stamps for pottery clay, texture, tuning, workshop


I would like to buy the mould for the ocarina is that possible please
I live In Sydney Australia