How to Build a Ceramic House
Hello, potter and future instructor. Whether you are preparing to lead your first course or just want a guaranteed successful project for your home studio, this guide is for you.
When students come to our Čertovina studio for their first lesson, they often worry about failing on the wheel. The pottery wheel is a great tool, but it requires practice and muscle memory. That is why we at Relyef strongly advocate for handbuilding with slabs.
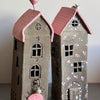
One of the most rewarding projects, engaging both kids in after-school classes and adults in evening workshops, is building ceramic houses and candle holders. Today, I will show you how to build one using our best-selling sets.
Watch our reel to see the whole process.
Watch our Youtube tutorial for extra detailed process.
From the Relyef Workshop: Why Windows and Doors Make or Break the House
Tomáš shares his perspective: "In my 35 years of working in ceramics, I've seen many students struggle to cut windows and doors into a rolled slab without distorting the wall or causing it to crack during firing. When we designed the Relyef Window Stamps and Door Stamps, our goal was to simplify the process. The 3D-printed tools have a precise cutting edge, preventing the clay from tearing."
Věra, drawing on her experience from studios in India and Switzerland, confirms this: international studios place heavy emphasis on lesson structure. An instructor cannot afford to waste time fixing crooked windows for multiple students at once. With this set, you hand your students a professional tool, freeing them to focus entirely on creative placement, roof construction, facade textures, and refining details. Moreover, you can easily load these small houses into any compact 230V kiln, which we typically recommend for schools and beginner studios.
Tools and Materials You Need
-
High-quality grogged clay (ideally 25% grog, 0–0.5 mm particle size).
Tip: Using properly grogged clay ensures the walls will hold their shape perfectly during the firing process.
-
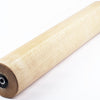
A Rolling pin and wooden thickness strips to roll out an even slab about 6–8 mm thick or our Slab Roller.
-
Relyef Window Stamps and Door Stamps.
-
Slip (liquid clay) for joining seams.
-
Engobe and a brush for surface finishing.
Step-by-Step Guide
1. Wall Preparation
Roll your clay slab to a uniform thickness. Using a ruler, cut out a rectangle that will form the perimeter walls of the house. You can either cut this into four separate walls or simply score and fold the corners.
2. Stamping and Cutting Details - The Relyef Magic
While the walls are still flat on your workboard, take your chosen stamp from the set. Press the tool into the clay with gentle, even pressure - it acts as both a stamp and a cutter simultaneously. Pull it out carefully, and you have a perfect window or rustic door, completely free of burrs.
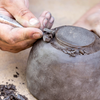
3. Assembling the House
Score the edges of the walls, apply slip, and join them together. Reinforce the inside corners with a thin clay coil and smooth it out.
Tip: Thoroughly compressing the inside coil guarantees your house will hold together like a rock in the kiln.
4. The Roof and Your Imagination
Attach the roof using an overlapping clay slab. The rest of the finishing and decorating is entirely up to your imagination.
Tip: Always cut small ventilation holes in the roof to allow heat from the candle to escape safely.
(In the videos and photos we are currently preparing with Věra at the Čertovina studio, you will see the exact hand pressure needed for the stamp - we will add them here soon!)


Building a Community - Get Involved!
Have you tried handbuilding houses before? How do you teach your students to attach the roof so it doesn't detach in the kiln? Let us know in the comments below the article- Věra and Tomáš will gladly answer and share their advice.
Do you want to try this project in your own course or studio? Equip your workspace with a set that gives us a 100% success rate.
Are you a studio owner or an instructor? Join the Relyef Studio Partner Program (RSPP) ceramics community and unlock additional benefits for your studio and your students.
