How to Make a Ceramic Ocarina: A Complete Guide for Future Masters of Sound
Step-by-Step Ocarina Making Process
Making a ceramic ocarina is based on the whistle principle, where airflow hits a sharp edge inside the resonance chamber. With the Rélyéf Ocarina Kit, which includes a two-part mould, a calibration plate, and a carving/tuning bit, even beginners can achieve accurate tuning. The key is rolling an even clay slab using a slab roller and carefully refining the mouthpiece edge at the leather-hard stage.
If you want to see the full process you can watch our instagram reel.
1. Prepare Your Clay Slab
Start with smooth, well-wedged clay. For a clean and clear sound, your ocarina needs an even wall thickness. The easiest way to achieve this is by using a Slab Roller.
Roll out a thin, consistent slab, this will become the base material for your instrument.
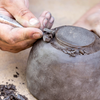
2. Shape the Ocarina Body
Take the two-part ocarina mould. Cut your slab so it slightly overlaps the mould edges.
Tip: Place a thin plastic sheet (such as cling film or a lightweight plastic bag) between the clay and the mould. This prevents sticking, keeps the mould clean, and makes demoulding much easier.
Repeat the same process for both halves.


3. The Mouthpiece (The Heart of the Instrument)
You have two options here:
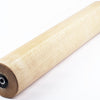
Option A: Extruder Method
Extrude the mouthpiece using our ocarina slot die, insert the calibration plate into it, and place the mouthpiece into the lower half of the mould.
Option B: Hand-Built Method
If you don’t have an extruder, place the calibration plate directly into the mould and build clay around it by hand.
The plate ensures the correct angle and width of the windway (air channel).


4. Join the Halves and Trim
Score the edges, apply slip, then press both mould halves together to join the clay.
Trim away any excess clay squeezed out at the seam using our harp cutter. This is faster and more precise than using a knife.

5. Tuning: Where the Music Begins
Once the clay has slightly stiffened to the leather-hard stage, open the mould and remove the plastic sheet.
Now the magic happens:
- Use the guide holes in the mould to mark and create the finger holes.
- Use the tuning/carving bit included in the kit to adjust and refine the holes.
Use a tuning app: Download any tuner app on your phone. Each finger hole produces a different note, and you can fine-tune the pitch by carefully enlarging the holes.
Important: Enlarging a hole lowers the pitch.
Work slowly and gently, at this stage the clay body is still fragile.


BONUS: Decorating with Stencils
Want your ocarina to look as good as it sounds?
Before pressing the slab into the mould, you can apply patterns using our flexible stencils and underglaze (engobe). The stencil adapts perfectly to the curved shape of the mould, creating a clean and professional-looking result.

-
Posted in
ceramics, clay, music instrument, ocarina


A video of your form and instruction would be greatly appreciated. Hard to know how to get the angle correct.
it took me a very long time to figure out the exact angle and shape of the opening to get sound out of my first hand built ocarina. each one i make gets easier and sounds better. there are some great videos on youtube that walk you through the process. good luck
Like a couple of others I have made this Ocarina carefully following your instructions you have provided to make it. I also can not get any sound from it. I am feeling somewhat annoyed as your other products have been of quality and that I have wasted my money on this.
Can you please either give more detailed clearer instructions or follow through the design to correct the fault.
i was very excited to purchase this mould but am now extremely disappointed with the product.
awaiting your response
kindest regards
Je veux uniquement votre numéro WhatsApp vendeur, pour faire achat flûte
Zvuku je potřeba dosáhnout v koženém stavu. A pak je potřeba to nezdeformovat. Je to podobně jako s píšťalkou, co se dělá z vrby. Je potřeba dosáhnout přesného toku vzduchu. A to lze jen u koženého stavu hmoty. Teda v tu chvíli se to dělá nejsnáze. Je potřeba využít špachtličky. TA určuje místo dotyku vzduchu na hranu okariny.