How to Dig and Process Your Own Pottery Clay
Back to Roots
Forget about that perfectly homogenous, bagged clay from the supplier for a moment. It’s reliable, convenient, and boring - someone else did all the interesting work for you.
This guide is about something else: finding, digging, and refining your own clay straight from the earth. We aren’t aiming for laboratory-grade precision here. Formulating a technically flawless body for large, demanding work is a complex science - one you won’t master in a backyard. But throwing a whistle, forming an ocarina using Ocarina moulds, or making pressed tiles from raw material you harvested with your own hands? That’s an experience store-bought body can never match.
First, the Boring (But Vital) Part: Land Access and Ethics
Every patch of ground belongs to someone. That includes the overgrown, abandoned pit outside the village that looks entirely neglected.
-
Get permission. Locate the property owner through local land registries. For a couple of buckets of raw earth, a verbal agreement is usually enough, but getting it is the line between an adventure and theft.
-
Check environmental protections. Decades-old clay pits frequently turn into sensitive ecosystems - nesting grounds for sand martins, amphibian habitats, or protected nature reserves. If it is a protected area, do not dig. Period.
-
Take only what you need. One or two 20-liter (5-gallon) buckets are plenty for your initial trials. Extra raw material just sits around taking up shop space.
This isn't a mere formality. Respecting the land determines whether you'll be welcomed back.
Step 1: Prospecting - Locating Historical Pit Sites
You don't need a degree in geology to prospect for clay. The most reliable trick is examining local industrial history.

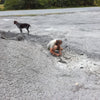
Historically, almost every region ran its own brickworks. The pit where they harvested raw material was local clay ground - and that is where you want to head. Brick-clay deposits are ideal for studio experimenters:
-
They contain a high ratio of loess and silt alongside clay minerals, giving the material good plasticity without being overly sticky.
-
You can spot them by their characteristic ochre to reddish-brown hue, caused by oxidized iron content.
-
They are excellent for small-scale projects: your first whistle, a clay pipe, or an ocarina pressed into Ocarina moulds.

Look for terrain depressions, cut banks, or overgrown embankments - often holding standing water. Local place names on topographic maps (e.g., Brickyard Lane, Old Clay Pit) are strong indicators.
Firing Temperature Warning
This is the most critical technical detail in this entire guide: brick clays are low-fire materials. They mature and ring clear around 900 °C (1652 °F). If you take this body past 1100 °C (2012 °F) in a high-fire kiln, it will vitrify prematurely, bloat, melt into a glassy slag, and fuse itself to your kiln shelves or floor.
High-fire potters actually use these fusible iron clays as slip glazes (albany-type glazes). For backyard processors, however, a low firing limit is a massive advantage: you can reach 900–1000 °C (1652–1832 °F) easily in a primitive outdoor kiln.
Did you know? Indigenous potters across the Americas built flutes and vessels from these exact local surface clays, firing them in open pit fires where temperatures barely reached 900 °C (1652 °F). Yet, those instruments produced, and still produce, deep, rich acoustic tones.
Step 2: Refining Raw Wild Clay
Freshly dug earth is packed with roots, pebbles, coarse quartz, and organic matter. Wet processing (slaking and blunging) is remarkably simple and easily done in a garden or yard.
Dug Earth ➔ Wet Slaking ➔ Sieving ➔ Settling & Decanting ➔ Dewatering ➔ Wedge & Knead
-
Slaking. Break dry clay lumps into small pieces and submerge them in a bucket of water. Let them sit overnight; dry clay slakes down automatically as water displaces air inside the pores. Mix into a thin slurry (slip).
-
Sieving. Pass the slurry through a fine mesh sieve (80–100 mesh). This captures organic debris, gravel, coarse sand, and most importantly - calcium carbonate inclusions (lime pops).
-
Settling. Leave the sieved slip undisturbed. The clay particles will settle to the bottom, leaving clear water on top. Carefully siphon or pour off the clear water.
-
Dewatering. Choose one of two studio-proven methods:
-
Plaster Bat: Pour the thickened slip onto a clean plaster slab. The porous plaster absorbs moisture rapidly.
-
Canvas Bag: No plaster? Pour the slurry into a dense canvas or burlap bag, tie it tight, and suspend it. Gravity will drive out the excess water over a day or two.
-
-
Conditioning. Once the clay releases cleanly without sticking to your hands, move it to the workbench. Wedge it thoroughly to remove air pockets and homogenize moisture content. Store the processed body in an airtight bag to age.
Tip: Never skip the sieving stage. Fine processing is the only thing protecting your work from post-firing structural failure caused by lime inclusions.
Lime Inclusions: The Potters' Silent Enemy
This section explains why fine sieving is non-negotiable.
Brick clays often contain calcium carbonate concretions (marl nodules or "lime pops"). During firing, these convert into quicklime (calcium oxide). Over weeks or months, the quicklime absorbs ambient atmospheric moisture, expands, and creates severe internal pressure.
The result? A chunk of the ceramic surface violent blows off, leaving a miniature crater. This structural failure is called lime popping or spalling, and it is completely irreversible.
-
Prevention: Slake thoroughly and pass the slip through a fine screen to trap coarse nodules.
-
Traditional Submersion Technique: Fine lime dust cannot be screened out completely. An old production trick for wild clays is to submerge the freshly fired bisque or earthenware pieces in cold water for 24–48 hours immediately after opening the kiln. Rapid hydration forces the fine lime particles to slake under controlled moisture conditions before destructive crystalline expansion occurs inside the wall. (Note: This is a mitigation step; severe inclusions will still blow the piece apart during firing).
-
When to walk away: If your fired test tiles spall consistently despite fine sieving, the deposit contains excessive fine carbonates. Do not waste more labor on that seam - locate a different clay vein.
Notes From the Workshop
Tomáš: "Wild brick clay is exceptionally vibrant - it works differently under the hand than commercial formulations, holding texture sharply. But expect two main quirks. First, high drying shrinkage: unrefined clay without added grog shrinks significantly more than standard bodies. Second, never judge a deposit by one spot. A bucket taken five meters down the slope can display completely different plasticity and firing behavior."
Věra: "I use wild clay collecting in my workshops as a lesson in material awareness. Students learn that clay isn't just a commodity out of a plastic wrapper - it's raw geological material with its own personality. When they pull a functional whistle or pressed form out of the kiln made from dirt they dug themselves, their relationship to ceramics changes forever."
Testing Your Wild Clay Before Investing Labor
Run these three simple shop tests over an afternoon to avoid ruined work later.
1. Plasticity Test
Roll a coil to the thickness of a pencil and wrap it around your thumb. If it bends smoothly with minimal surface cracking, plasticity is excellent. If it snaps or crumbles, the body lacks fine clay fraction - it needs aging or an addition of secondary ball clay.
2. Shrinkage Test
Roll a flat slab and scribe two fine lines exactly 10 cm (4 inches) apart. Allow it to bone-dry, measure the distance, then fire it to your target cone and measure again. The difference represents total linear shrinkage. Wild clays shrink significantly; knowing this rate allows you to scale up forms accurately when using precision tools like a Manual Slab Roller or Slab Roller.
3. Absorption (Vitrification) Test
Weigh a fired test tile dry, submerge it in water for 24 hours, wipe off surface moisture, and weigh it again. The percentage gain indicates porosity. High absorption means the body remains porous and non-vitrified at that temperature, confirming it is unsuitable for functional dinnerware.
Tip: Always stamp or scribe identification details into your test tiles before drying so you can track different clay seams and firing temperatures without mix-ups.
Realistic Limitations of Wild Clays
-
Structural scale: Without added temper (chamotte or grog), raw clay warps and cracks easily on large, thin forms. Building larger pieces requires blending in grog or sand.
-
Dinnerware safety: Low-fired, porous earthenware bodies should not be used for food contact surfaces due to bacteria absorption and moisture seepage. Reserve wild clays for decorative pieces, tiles, ceramic whistles, or forms.
-
Batch inconsistency: Natural veins vary continuously. Embrace this variation as part of the material's unique character rather than expecting industrial predictability.
Recycling note: Unfired greenware scraps from wild clay can be slaked down and re-processed indefinitely using the exact same water-bucket method as commercial clay bodies.
FAQ
Can I fire wild clay in a kitchen oven?
No. Kitchen ovens peak around 250 °C (482 °F). True ceramic bonds (dehydroxylation and sintering) begin above 600 °C (1112 °F), requiring a dedicated kiln or a well-constructed outdoor wood-fired kiln reaching at least 900 °C (1652 °F).
Why did my piece explode or crack in the kiln?
Trapped moisture is the primary culprit. Rapid heating turns residual water into steam, causing explosive spalling. Allow wild clay pieces to dry completely - often up to two weeks for thick walls - and ramp up kiln temperatures slowly. Trapped air pockets from poor wedging are the second most common cause.
What happens if I don't sieve the clay fine enough?
Coarse sand grains cause cracking during shrinkage, while unseen limestone bits will cause severe spalling (lime pops) weeks after the firing is complete.
Is wild clay safe for functional mugs or bowls?
Generally no. Clay fired at 900 °C (1652 °F) remains porous, making it porous to liquids and mechanically fragile for daily washing and eating. Stick to decorative items, tiles, or acoustic pieces.
How can I tell if raw earth contains enough clay while in the field?
Moisten a small sample on-site and try rolling it into a thin ribbon between your palms. If it forms a cohesive ring without crumbling immediately, you have found a usable clay seam.
Join the Conversation
Have you ever prospected and refined your own wild clay? Where did you source your deposit, and how did the material perform during firing?
Drop a comment below with your experiences or pictures of your fired pieces. We read every response and are happy to troubleshoot your processing steps!