From Zero to Ceramic Studio: How to Set Up Shop Without Losing Your Mind
Mugs are piling up at home. Your family is quietly refusing another handmade bowl for their birthdays. And in the back of your mind, a thought you haven't dared to speak out loud keeps flickering: What if I opened my own studio?
Then you fire up Google and immediate cold sweat sets in. Kilns, wheels, health safety, electrical wiring, clay bodies, plumbing, insurance. Every article says something different, and none of them tell you where to actually begin.
Here at Rélyéf, we’ve been working in ceramics for over 30 years. We’ve watched dozens of studios open and, sadly, shut their doors. Almost always, it comes down to the same three missteps: choosing the wrong workspace, over-investing in equipment on day one, and offering workshops that lack a clear outcome.
This article is part one of a series on how to build your space the smart way.
First, Get Clear on Your Studio Model
This is the single most skipped step - and skipping it leads straight to buying the wrong tools for the wrong space. There are three primary studio models, each with distinct economics:
-
Workshop Studio: Your main revenue comes from teaching the public. You need a large central table, plenty of seating, and kiln capacity to handle bulk firings of twenty student pieces at once. Cash flow is predictable, but you are tied to the role of an instructor.


-
Open Studio: Members pay for access or hourly bench time to work independently. You need extra shelf space for drying, more pottery wheels, and clear house rules. Less teaching, more space management.
-
Private Studio with Occasional Classes: The workshop is primarily for your personal production, with occasional classes to help cover rent. This model requires the lowest initial capital and gives you maximum creative freedom.
Most makers think they want the first model when they actually crave the third. Decide where you fit before signing a lease - every model demands a different physical layout.
Step 1: The Space and Its Hidden Cost Drivers
Forget about aesthetic Pinterest shelves for a moment. Before you design the look of your studio, solve these four technical fundamentals that determine whether your space can function at all.
Electricity
A ceramic kiln is the hungriest appliance in your studio and this is where the most expensive mistakes happen. People often buy a kiln first and figure out where to plug it in later.
Power requirements are driven by the kiln model, not just its internal volume. A small studio kiln might require a three-phase 400 V setup, while an identical-sized model might run on a single-phase 230 V line. Internal volume won't tell you what outlet you need; the machine’s technical data sheet will.
Always approach this step in reverse:
-
Audit your space. Do you have a 400 V three-phase connection, or just standard 230 V circuits? What are your breaker capacities and panel headrooms?
-
Select your kiln model based on available power. Studios without three-phase power often opt for 230 V units - not because they want a smaller kiln, but to avoid paying thousands for utility upgrades.
-
Dedicated circuit required. No matter which model you select, your kiln must run on its own dedicated fused circuit. Never run a kiln on an extension cord shared with an electric kettle.
Tip: Bring an electrician to inspect the space before signing a lease. Pulling a new 400 V power line into a commercial space can cost more than the kiln itself.
Glaze testing in practice: Test tiles show you how a glaze flows into the recessed areas of the stamped design, where it reveals the clay body, and where it creates a rich, saturated color effect before you apply it to a finished piece.

Ventilation
During firing, clay bodies and glazes off-gas organic additives and trace minerals. Your kiln room needs dedicated extraction or controlled, active ventilation so you don't have to sit in fumes during a burn-off cycle.
Dust Control
This is the most overlooked safety hazard in ceramics, yet it is critical for respiratory health. Dry clay dust contains free crystalline silica. Never sweep a studio floor with a dry broom - it suspends fine particles in the air for hours.
-
Install smooth, washable flooring and rely exclusively on wet mopping.
-
Use a shop vacuum fitted with a true HEPA filter. Standard domestic vacuums blow respirable dust right back into the room.
-
Wipe dry clay off work surfaces using a damp sponge rather than brushing or blowing it off.
Plumbing and Clay Traps
Rinsing clay down standard plumbing is a slow-motion disaster. Clay settles in the trap, hardens, and eventually destroys your pipes. Install a dedicated settling tank or clay trap beneath your sink, clean it periodically, and recycle the reclaimed slip instead of sending it down the drain.
Step 2: Outfitting Your Studio - Essentials vs. Extras
Capital goes fast when equipping a new workspace. Here is an uncompromising breakdown of what you need on day one versus what can wait.
Buy Immediately:
-
Sturdy, washable work tables - heavy wooden workbenches or plaster-topped tables that pull excess moisture from fresh clay.
-
Drying racks. You will always need more shelf space than you think. Take your highest estimate and double it.
-
A properly sized kiln. A smaller kiln burns through cycles faster, letting you test clay bodies, glazes, and firing schedules with short turnaround times.
-
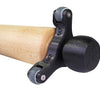
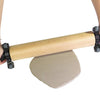
Essential hand tools - wooden rollers, rib tools, loop tools, sponges, buckets, and basic handbuilding gear.
-
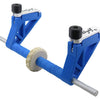
Tools that guarantee consistent results - Ocarina moulds, texture rollers and Flexible stencils.
Hold Off On:
-
Pottery wheels. Throwing takes weeks of dedicated instruction before a beginner yields anything usable. Installing five wheels on day one drains your startup capital and frustrates new students.
-
A large Slab Roller. Unless you are running continuous slab production, a Manual Slab Roller or standard rolling pin gets the job done. Read our guide on rolling pins to see when upgrading to a dedicated roller makes financial sense.
-
Extensive glaze inventories. Start with three to five reliable glazes and build a comprehensive set of test tiles.
From the Rélyéf Workshop
Tomáš notes: “When Radovan and I designed our first texturing tools and stencils, our goal was to simplify the path to a finished piece. A student who spends three hours handbuilding a bowl that cracks in the kiln or loses its shape gets discouraged fast. My advice for a new studio owner: don't sink your budget into pottery wheels right away. Start with handbuilding. By using precise textures and stencils, even a total beginner leaves their very first session with a polished piece they’re proud of. That’s what brings them back.”
Věra adds: “Having worked in studios across Switzerland and India, I've seen one truth hold everywhere: people don’t pay to just 'mess around with clay.' They want a clear, tangible result. A workshop built around a concrete deliverable fills up naturally. A general class with no defined output has to be resold every single time.”
Step 3: Structure Workshops Around Deliverables, Not Techniques
This is the easiest way to make your studio profitable from month one.
"Handbuilding 101" is a tough sell." Build a Functional Ceramic Ocarina That Actually Whistles" sells itself. It uses the same clay, the same handbuilding techniques, and the same three-hour slot - but the value proposition is clear.
Proven Beginner Workshops:
-
Slab-Built Houses - Simple slab construction, accessible for all skill levels, with high visual appeal.
-
Ocarina Flutes - A clay instrument that plays a real note. The moment a student gets their piece to whistle, your next workshop sells out.

Joy that truly sings: Ceramic ocarinas and heart-shaped whistles. A project with a clear outcome, where course participants explore working with textures and take home a fully functional musical instrument.
-
Custom Door Signs or Address Plaques - Personalization using letter stamps. People love making custom items featuring their family name or home address.

A clear result for the first class: A geometric cup decorated with a set of Baltic symbols. The compact organizer keeps the stamps neatly together on the table, so the lesson can run smoothly without wasting time searching for individual symbols under a pile of clay.


Tip: Your introductory workshop should always send students home with a completed greenware piece, not a promise that "we'll finish it next time."
Step 4: Calculate Workshop Pricing Before Publishing Dates
You don't need accounting software - just grab a pencil. To price a single seat accurately, calculate:
-
Raw materials: Clay body, slips, and glazes per piece.
-
Kiln energy cost: Electricity used for both bisque and glaze firings. Check your kiln’s kW rating against your local utility’s per-kWh rate.
-
Facility overhead: Rent, insurance, and utilities broken down into hourly operating costs (including setup and teardown time).
-
Labor: Your instruction time plus kiln loading, unloading, post-firing sorting, and customer messaging.
-
Loss allowance: Factoring in a 5–10% breakage rate for drying and firing failures.
Multiply these costs, factor in your profit margin, and divide by the minimum number of paid seats. If your workshop isn't profitable at 70% capacity, adjust your price or scale back overhead. Most studios that fail don't lack students - they underprice their seats.
What If You Don't Want to Run a Commercial Pottery Business?
Not every studio owner wants to produce production pottery or run a high-volume workshop schedule.

Tested under extreme conditions at UMPRUM: Tomáš Macek during a Kuro Raku firing at 1250°C. Even at such high temperatures and in the intense reduction atmosphere, impressions made with Rélyéf stamps retain their sharp, crisp detail.
If you love working with clay, sharing techniques, and building a community, but hate the idea of mass-producing mugs or selling at craft fairs, you need a space that pays for itself. Rent, electricity, clay bodies, and kiln maintenance are real costs.
That is where the Relyef Studio Partner Program (RSPP) comes in - not as a complex corporate model, but as a practical way to sustain your community space.
Step 5: Lower Your Overhead with RSPP
Running a studio is capital-intensive. We created the Relyef Studio Partner Program to help studio owners manage operational costs in three straightforward ways:
-
20% Equipment Discount: Partner studios receive 20% off all Rélyéf studio tools from their very first order.
-
10% Student Discount: You get a custom referral link and a studio poster with a QR code. When students want to buy their own tools for home use, they get a 10% discount.
-
10% Affiliate Commission: Your studio earns a 10% commission on every order placed through your referral link, creating passive revenue to offset rent, clay, and power bills.
Best of all, there is zero inventory overhead. You don't store, pack, ship, or handle customer support - we manage all fulfillment directly. You simply use the tools in your daily work.

You also join an international network of ceramic artists and studio managers sharing technical tips, glaze recipes, and studio management insights.
Pitfalls to Avoid
-
Choosing a space based on rent instead of power availability. Bringing high-amp three-phase power into a cheap location can end up costing more than renting a pre-wired space.
-
Buying all high-end machinery upfront. Capital spent on excess wheels or extra-large kilns belongs in your cash reserves to carry you through the first six months.
-
Failing to build a recurring student base. One-off taster sessions bring people in, but intermediate programs and open-studio memberships keep your business sustainable.
Tip: Working with clay is messy. Keep a set of dedicated studio clothes on-site, and never try to rub wet clay off fabric - let it dry completely, then brush it off outdoors.
Join the Community
Are you currently outfitting a studio or planning your space? What is your biggest obstacle right now - sourcing a space, setting up electrical lines, or pricing your workshops?
Drop your questions in the comments below. Věra and I read every message, and we regularly test tools and workflows in our Čertovina training studio to bring you field-tested solutions.
Ready to take the next step?
-
For new studio owners: Apply for the Relyef Studio Partner Program to equip your workspace with a 20% discount on your initial order.
-
For instructors and schools: Explore our selection of Ocarina moulds, texture rollers and Flexible stencils designed for project-based learning.
-
For distributors and retailers: Contact our B2B team for wholesale pricing and studio supply terms.