How to Store Clay for Pottery
How to Manage Your Clay Properly (So It Works With You)
Clay is more than just “material.” It responds to moisture, pressure, time, and the way we treat it in the studio. When your clay is prepared well and stored with care, everything gets easier: throwing feels smoother, handbuilding becomes more predictable, and decoration looks cleaner.
This guide covers simple clay habits that reduce cracks and frustration, plus a few small upgrades that can make your process more consistent. It’s based on what’s worked for us in the studio, and you can tweak it to fit your own process.
1) Choose the right clay body and keep it clean
There is no single clay body that works for every project. A wide-based pitcher, for example, puts extra stress on the lower section during drying and firing. For wide forms (like pitchers or large bowls), a slightly grogged clay body can help the piece stay stable as it dries. For crisp carving and clean surface detail, a smoother body is often easier to refine - but keep each clay body separate in your studio to avoid accidental mixing.
One rule will save you a lot of trouble: don’t mix clay bodies by accident. Even a small amount of contamination can change shrinkage and drying behavior, which often shows up later as cracking or rough surfaces.
That’s why tool hygiene is part of clay control. Keeping your tools and work surface clean prevents small bits of one clay body from hitchhiking into another - especially when you move between smooth and grogged clays so your surfaces stay clean and your results stay predictable.
2) Match moisture stage to the task
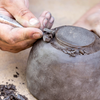
Most “clay problems” are actually moisture-stage problems. Soft clay is ideal for wheel throwing, firmer clay is better for joining and building, and leather-hard is the sweet spot for carving, stamping, and crisp surface detail.
If you decorate with patterns, timing is only half the story. The other half is surface preparation. When you smooth and lightly compress the clay surface before adding texture, you get sharper results and fewer torn edges.
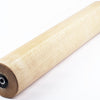
This is where good tools really shine. A reliable set of stamps makes it easier to get a clean impression without dragging the clay or distorting the form. And if you work with larger surfaces, your texturing rollers can be a great helper for consistent pattern across mugs, vases, and slab-built pieces.
3) Store clay like it’s part of your workflow
Clay loves stability. Your goal is controlled moisture, not “as wet as possible.” If clay becomes too hard, a simple trick is to poke a few holes into the block, moisten it, and seal it tightly so water can move inward evenly. After resting, wedge thoroughly until the feel is consistent.
For clay you keep in rotation, wrapping it tightly and storing it in a sealed box helps prevent the daily cycle of drying out and rescue rehydration. Whatever clay body you use, keep it protected from dust, scraps, and grog contamination so it stays consistent and easy to work with.
4) Reactivate clay before you throw or build
Clay that has been sitting usually needs reactivation. Wedge it until the feel is even, or slam it firmly onto your work surface a few times and then wedge. This evens out moisture pockets, improves plasticity, and reduces weak spots that can lead to cracks later.
5) Reclaim without turning it into chaos
A well-run studio produces surprisingly little waste. Save trimmings slightly damp, store them sealed, and keep different clay bodies separated. Reclaim works best when you process it in batches, because consistent clay is far more predictable than a “mystery mix.”
If you throw a lot, a basic settling bucket and a drying surface (like plaster) can make reclaim easier and cleaner.
Final takeaway
When you care for your clay, it becomes reliable. Your making feels calmer, your studio stays cleaner, and your results improve faster.
If you want tools that support clean shaping and crisp surface work as your skills grow, explore the Relyef collection at Relyef Pottery Tools.


I need a ceramic clay
I need ceramic clay